2- How to configure nic teaming
In the previous lesson, we talked about
1- Introduction to nic teaming and its types
In this lesson we will talk about
How to configure nic teaming #
We collect the cards or ports so that one exit comes out and then we make a virtual inter face (VIF)
I will tell him that the network card is a slave and that the master is a virtual inter face
There are two ways to collect more than one card #
1-bonding it works in red hat 6 and redhat 7 and it works with kernel #
2-teaming and it works on red hat 7 only and it is the best and it works with user space #
In this lesson, we will explain the second method
We install team with the following command:
yum install -y teamd
We write the following command to make the settings for the network cards
nmtui
The following options will appear:
Choose Edit a connection
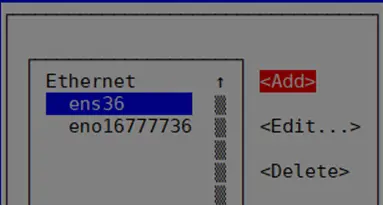
After that, the cards on the server will appear with their names
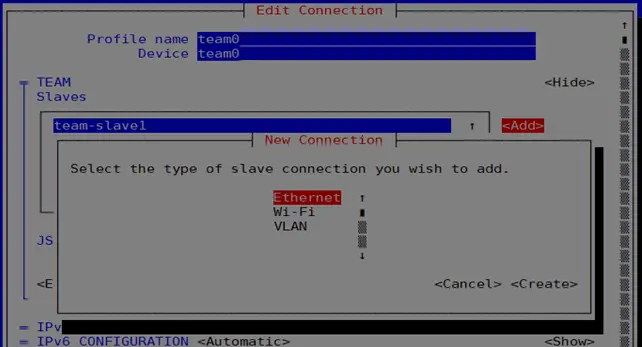
Choose the first card as in the following picture and press add
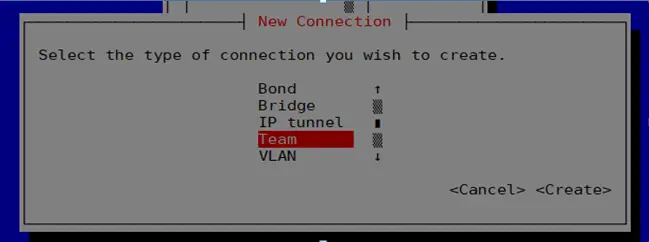
We choose team, then click on create, as shown in the following picture:
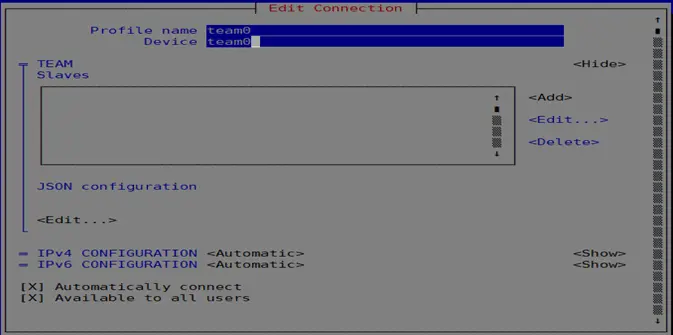
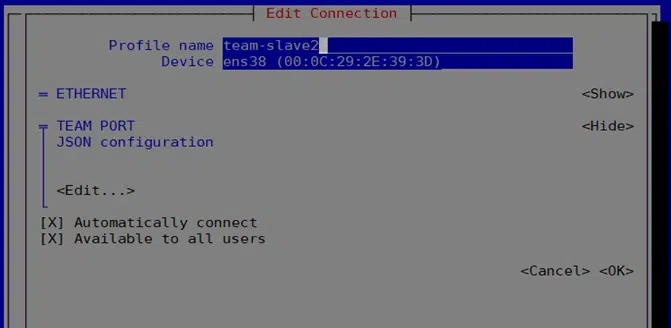
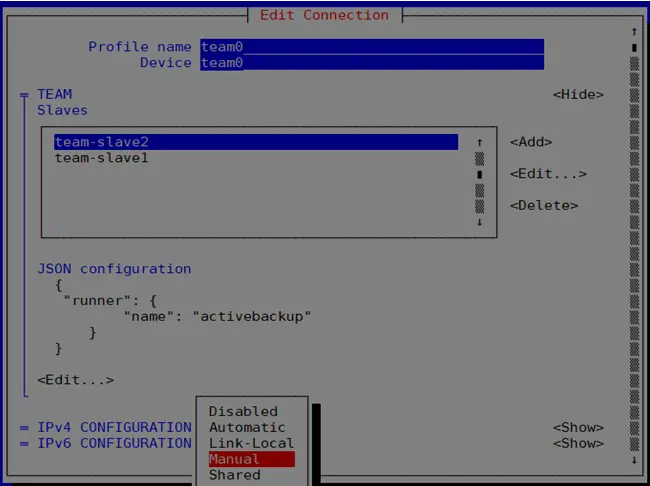
Wee make the settings as follows:
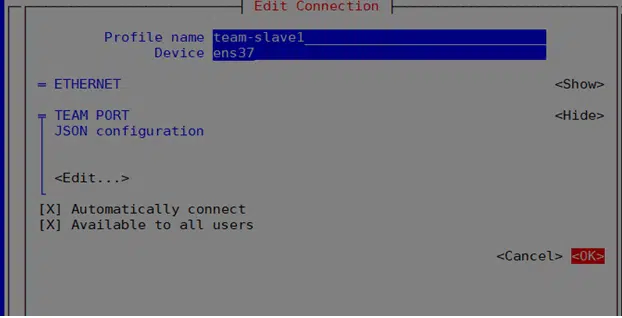
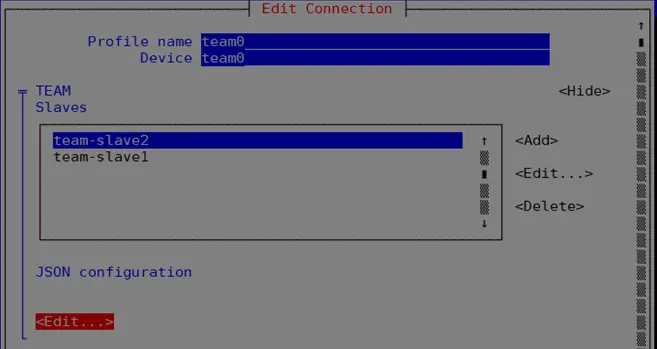
We also add the second card, as in the picture
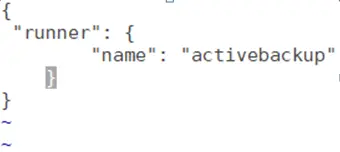
After adding the network cards that we want to create a team for, I come to add the json configuration
To get the json configuration we will find it under the following path:
/usr/share/doc/teamd-1.27/example_configs
We will find all the previous types that we referred to in the previous lesson #
1- Introduction to nic teaming and its types #
Choose the type you want to configure
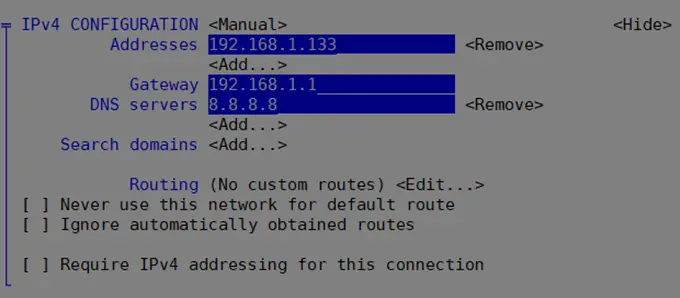
After making all the previous settings, you must give our team or our virtual interface ip in order for it to work
Explanation 2- The way the configuration nic teaming works has been completed
The previous lesson was an introduction to nic teaming and its types
Greetings from the Hyyat Host team


